Showing posts with label vegetarian. Show all posts

Monday, January 12, 2015

Lentil-Veggie Stew, a One Pot Winter Pleasure

Over the weekend, the rain beat down steadily all day. At first more like a mist at a car wash, then in steady sheets that drenched any one deciding the time was perfect to visit a favorite restaurant. Which is exactly what we did. We met our sons at Yabu in West Los Angeles (11820 W. Pico Blvd, Los Angeles, CA 90064, 310-473-9757)  for a 2015 New Year's dinner.

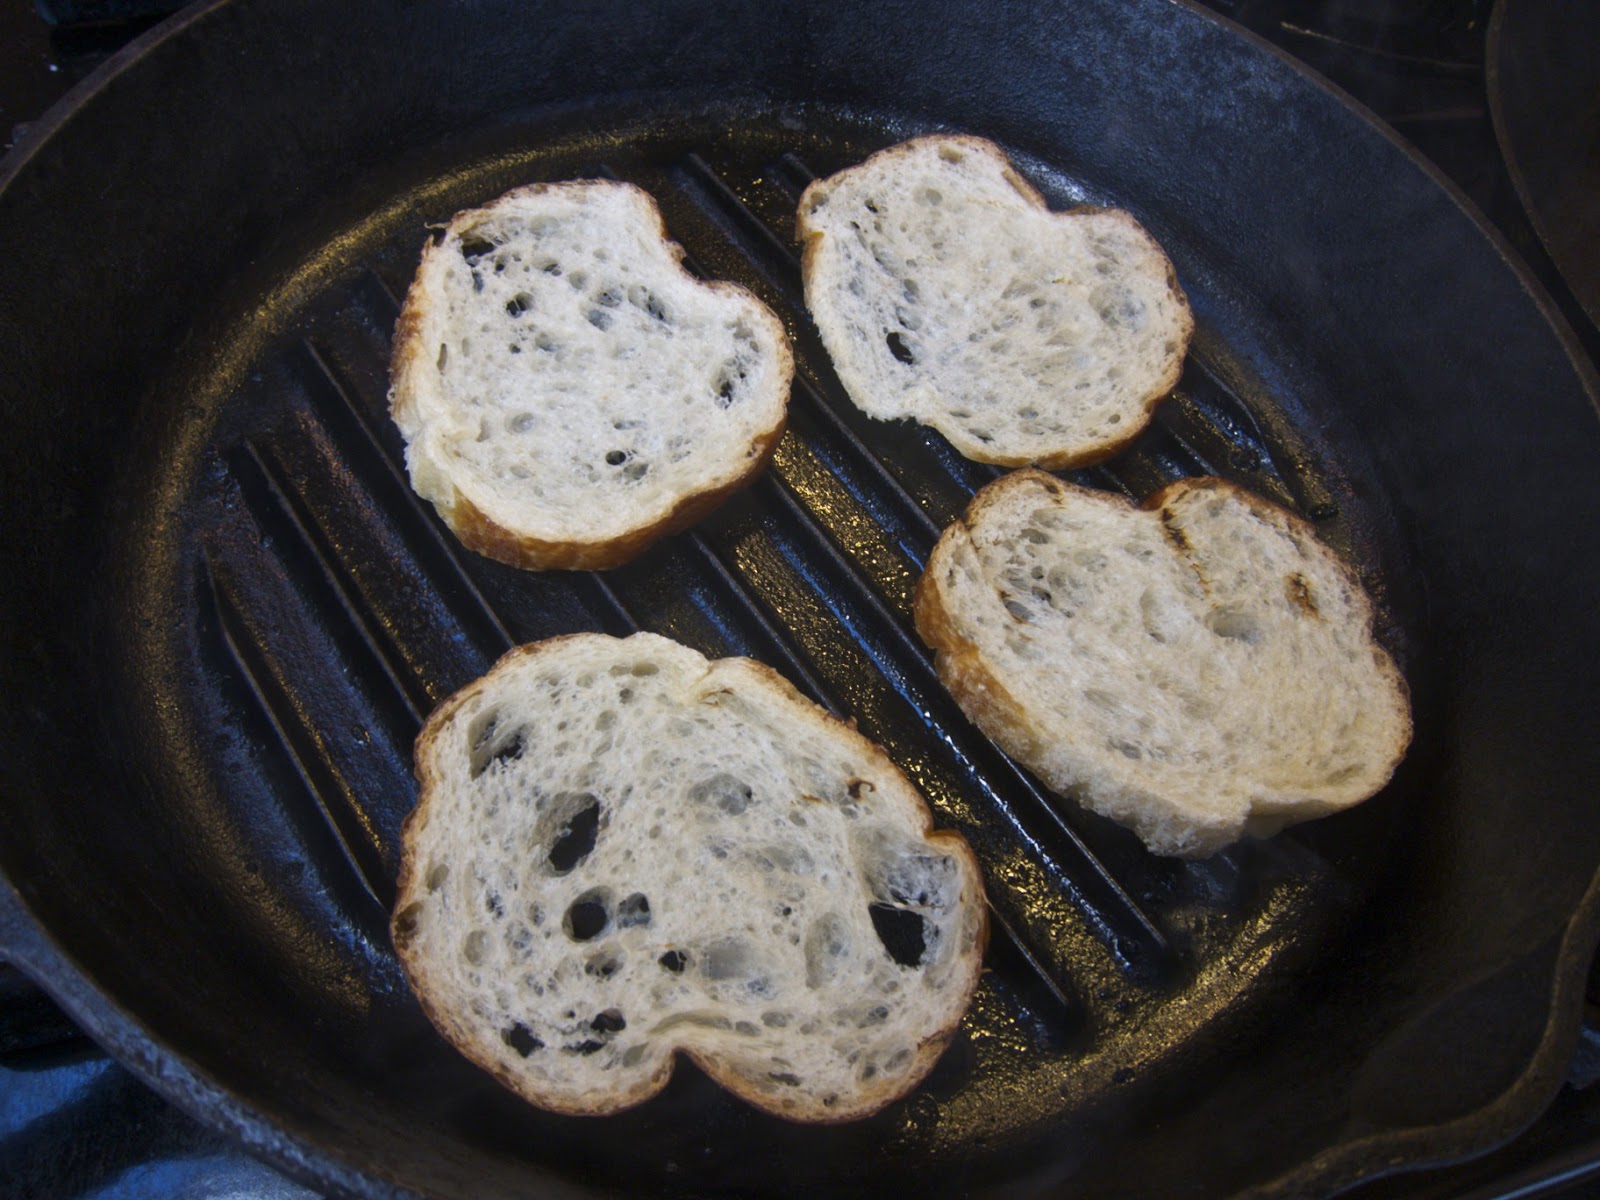
With the weather outside cold and wet, we were happy to be inside the busy, warm restaurant. We ordered our favorite dishes: udon with mushrooms, tempura vegetables and shrimp on seasoned rice, salmon sashimi with pale white daikon threads & wispy pickled seaweed, spinach salad seasoned with mirin and sesame paste, sea urchin (uni) sushi with quail yolk, egg omelet sushi (tamago), baked crab hand roll and hot soba in soup with thinly sliced scallions and paper thin sheets of fatty duck breast.
We talked, shared a bottle of hot sake and looked at photographs from our holiday trips. A great way to begin the new year.

Yesterday the rain was reduced to a light drizzle. Not enough to soak through a thick sweater but enough to chill skin and bone. When it was time to think about dinner, I had only one thought. Cook something easy. Cook something in one pot. And make sure it is hot, filling and delicious.

A few years ago a press trip took me Spokane, Washington and Moscow, Idaho. The area is well-known for its agricultural products, most importantly lentils. A representative of the USA Dry Pea & Lentil Council gave us a "Lentils 101" talk that described the many varieties of lentils, their nutritional value and economic importance to protein-starved regions of the world. Each of us was given a copy of The Pea & Lentil Cookbook: From Everyday to Gourmet which has recipes using dried legumes in dishes as varied as appetizers, soups, salads, entrees and desserts.

Cooking with lentils is easy.

The basics are wash and rinse the lentils. Discard any broken or misshapen lentils. Generally speaking lentils are cooked in water at a ratio of one cup of lentils to two and a half cups of water. Simmer covered for 30-50 minutes, tasting the lentils as they cook and removing the pot from the stove when they are to your taste. Cooked longer, lentils will soften and can be used in purees for soups, dips, sauces and spreads.

I like the lentils to retain their shape so I cook them only until they are al dente.

Lentils with Shiitake Mushrooms and Vegetables

Lentils come in many varieties. They are not all the same. Find the ones you like. My favorites are Beluga or black lentils and Spanish pardina lentils, which I used last night.

Roasted tomato sauce adds a pleasing acid. Canned tomato sauce may be used, but a better alternative is to make your own. For Zester Daily I wrote about making roasted tomatoes and sauce to keep in your freezer.

Serves 4

Ingredients

1 cup lentils
2 1/2 cups water
1 tablespoon olive oil
1/4 teaspoon sea salt
1/8 teaspoon freshly ground black pepper
Pinch of cayenne (optional)
1/4 teaspoon ground cumin
1/4 teaspoon turmeric powder
1 garlic clove, washed, skin removed, minced
1 medium sized yellow onion, washed, paper skin, root and stem ends removed, finely chopped
2 cups mushrooms, preferably shiitake or brown, washed, the ends of the stems removed, finely chopped
1 medium sized carrot, stem cut off, peeled, washed
1 large roasted tomato, washed, stem removed or 1/2 cup roasted tomato sauce
2 cups spinach leaves, washed and thin sliced

Directions

Rinse the lentils, discarding any that are broken or discovered.

In a 2 quart sauce pan, heat the olive oil. Add the dry spices and garlic. Lightly brown.

Add the onions, mushrooms and carrots. Saute until lightly browned.

Add the lentils, water and roasted tomato sauce. Stir well. Bring to a simmer. Cover.

After 15 minutes, add the spinach leaves. Stir well. Cover.

The lentils may take 25-45 minutes to soften. How long depends on many factors. After 25 minutes, taste a few lentils. If they need more cooking and the liquid has evaporated, add enough water to keep the lentils covered.

Stir well, cover and continue cooking, checking the pot every 5 minutes until they have achieved the desired texture.

Serve hot.


Friday, December 5, 2014

A Winter Pick-Me-Up: Roasted Vegetable Salad


Roasted kale and celery root salad.

In summer, a ripe tomato salad mixed with peppery arugula leaves and bits of salty, creamy Bulgarian feta can be a meal in and of itself. When the weather cools and a weakening sun denies farmers the heat they need to grow nature’s leafy wonders, we still hunger for salads but now it’s time to look to hearty greens and root vegetables to satisfy that craving.
In winter, walking through the local supermarket’s fresh produce section, it’s easy to believe we live in a one-season world. Vegetables and fruit that require summer’s heat are stacked high in the bins. But one taste and it’s easy to tell, these delectables have been grown out of season or traveled long distances to reach our tables.
Root vegetables like celery root, beets, turnips and potatoes grow well in the colder months. When roasted, their starches convert into sugar, coaxing the best out of these subterranean gems.

Winter produce is perfect for roasting

Sturdy leafy greens, like kale, especially black or Tuscan kale, come into their own at this time of year. Delicious raw in a salad, tossed with toasted hazelnuts, and a simple vinaigrette, kale reaches new heights of deliciousness when roasted.
When roasted, oil and heat drive moisture out of the kale, creating an airy crispness. That delicate texture beautifully complements the earthiness of roasted root vegetables when combined in a warm vegetable salad.
latt-celeriac2
Picture 1 of 7
Celeriac, celery root, peeled and cut in half. Credit: David Latt
Having only recently tried celery root or celeriac, I had to look beyond its decidedly unattractive exterior. Put simply, celeriac may have a pretty name, but it is a very ugly duckling.
You have to wonder at the leap of faith it took the first person who ate celeriac. What possessed that brave diner to bite into the pale brown bulb, stippled with stiff, hairy roots?
Only when the woody outer skin is peeled like a pineapple is the pale white flesh revealed. Cut into matchsticks and tossed with olive oil or mayonnaise, raw celeriac makes a refreshingly crisp salad. Like kale, however, celeriac achieves its best self when roasted.

Winter’s Best Salad: Roasted Black Kale, Celery Root, Shiitake Mushrooms, Shallots and Garlic

Simple and easy-to-prepare, a roasted vegetable salad can combine any of your favorite vegetables. For this dish, I wanted to complement roasted kale’s crispiness with tender, savory roasted celery root. Shiitake mushrooms, whole garlic cloves and large shallots added flavors to round out the umami of the dish.
Serves 4
Ingredients
2 pounds celery root or celeriac, washed, peeled, cut into batons 2 inches by ½ inch, yields 1½ pounds
6 shiitake mushrooms, washed, halved
3 garlic cloves, root ends and skin removed
1 bunch black kale, washed, stems removed
3 large shallots or 6 small shallots or 1 medium yellow onion, root ends and outer skin removed, washed, quartered
1 tablespoon olive oil
Sea salt and freshly ground black pepper to taste
A pinch cayenne pepper (optional)
Directions
1. Heat the oven to 350 F.
2. Separately, toss each vegetable with a drizzle of olive oil, season with sea salt, pepper and cayenne (optional).
3. On a large baking pan lined with a Silpat sheet, parchment paper or aluminum foil, lay out the vegetables separately because they cook at different times. Place the pan in the oven.
4. Every five minutes, use tongs to turn the vegetables for even cooking, using the following times as a guide: kale leaves (10 minutes), shiitake mushrooms, shallots and garlic cloves (20 minutes), celery root (30 minutes).
5. Except for the kale, using a paring knife, check each vegetable for doneness.
6. After cooking, roughly chop the shiitake mushrooms, shallots and garlic cloves.
7. In a flat bowl, toss together the celeriac, shitake mushrooms, shallots and garlic cloves. Top with the crisp kale leaves.
8. Serve immediately to avoid the kale leaves losing their crispness.
Variations
  • Together with the other vegetables, roast 2 large carrots, ends trimmed, peeled. Cut these into 1-inch rounds, seasoned with sea salt, pepper and olive oil and added to the chopped salad after roasting.
  • Roast 2 large beets, whole, stems and leaves removed, washed, drizzled with olive oil. Place these on a lined baking sheet and cook in a 400 F oven for 45-60 minutes or until a paring knife pierces the flesh easily. Use rubber gloves to handle the beets. When cool to the touch, trim ends and peel off the skin. Rough chop the beets and toss with olive oil, sea salt and pepper separately so they do not color the other vegetables. Place them on the bottom of the serving bowl before adding the other vegetables.
  • Season the vegetables with your preference of herbs, such as fresh rosemary, sage or tarragon, or toss any one of the herbs with olive oil and roast on a lined baking sheet in a 350 F oven for five minutes. Remove the leaves, finely chop and sprinkle over the cooked vegetables before tossing.

Tuesday, June 3, 2014

Father's Day Deserves a Feast, Start with the Grill

This year I will be out of town on Father's Day. I'll miss being with my sons on that special day. We already have a bealted-Father's Day date two weeks later when we will all be in town. I can hardly wait!

Since Father's Day coincides with the start of summer, grilling is the best way to celebrate male parenting.

For me, nothing is better than a platter of grilled Italian sausages with sautéed onions, deveined shrimp seasoned with olive oil, sea salt and black pepper, corn on the cob, charred red peppers mixed with capers and garlic and lobsters split open and doused with pats of sweet butter.  With a tossed arugula and carrot salad, a loaf of freshly baked bread and a fresh fruit salad and I am happy.
The best grilling is the easiest kind. Buy good sausages, seafood and chicken, drizzle with olive oil, season with sea salt, pepper and any dried herb you fancy, put it on a hot grill, turn diligently to prevent burning and serve when it's done.

When the boys come to the house to celebrate a birthday, mother's day or father's day, they frequently take command of the grill. As my younger son, Michael, reminds me, they are my sons so of course they are good cooks. And that makes me very very happy.

Our other son, Franklin, doesn't regard a meal a proper meal unless there are appetizers. The secret to a great grilled meal is what's served on the side. My contribution to your Father's Day celebration are three of my favorite sides. 

All three are addictive so you may find you'll be eating them all summer long. They are all easy-to-make. The tapenade and lavash crisps can be made a day or two ahead. The grilled corn salsa is best made fresh.


Grilled Corn Salsa

Adding corn caramelized from light grilling gives this salsa it’s distinctive sweetness. When you buy corn from the market, look for plump kernels. Avoid ears with wrinkled or shriveled kernels.
You can use any kind of ripe tomato you enjoy, but I prefer cherry tomatoes because they are sweet and they hold their shape after being cut up. For added color, select a basket with a mix of yellow and red cherry tomatoes.

Serves 4

Ingredients

1 ear of corn, husks and silks removed, washed
1 8 oz basket of ripe cherry tomatoes, washed, quartered
1 large shallot, ends and skin removed, washed and roughly chopped
½ cup Italian parsley, washed, leaves only, finely chopped
¼ teaspoon cayenne
2 tablespoons olive oil
Sea salt and black pepper to taste
Lemon juice to taste (optional)

Directions

Pre-heat the grill to medium-hot.

Drizzle the olive oil on a large plate and season with sea salt and black pepper. Roll the ear of corn to coat. Using tongs, place the corn on the grill.  Turn frequently to prevent burning.  Remove the corn when all the sides have light grill marks. Let cool. Cut off the kernels and place in a large mixing bowl.

Use a rubber or silicone spatula to transfer the seasoned olive oil from the plate into the mixing bowl with the corn.

Add the quartered cherry tomatoes, shallot and parsley. Toss well and season with the cayenne. Taste and adjust the flavors with more sea salt, black pepper, olive oil and lemon juice (optional).

Tapenade with Charred Garlic

A secret weapon in last minute cooking, tapenade brightens any meal either as an appetizer or a condiment. If you use pitted, canned olives, making tapenade will take 10-15 minutes.
 
The taste of your tapenade depends on the quality of the olives.

Serves 6-8

Ingredients

1 can pitted olives, drained weight 6 oz., preferably green or kalamata olives
2-3 tablespoons olive oil
2 garlic cloves with skins
¼ cup Italian parsley, washed, leaves only, roughly chopped
¼ teaspoon pepper flakes (optional)
Black pepper to taste

Directions

Skewer the garlic cloves on the end of a knife or a metal skewer and hold over a gas flame to burn off the outer skins. Let cool, remove any pieces of charred skin and roughly chop the cloves.

In a small blender or food processer, place the drained olives, olive oil, garlic, parsley and pepper flakes. Pulse until the olives are roughly chopped. Taste and adjust the seasoning with the addition of black pepper, sea salt, pepper flakes and olive oil.

Pulse again until the tapenade achieves the desired texture. Personally I like a tapenade that has a rustic look with the olives coarsely chopped rather than puréed.

Refrigerate until ready to use and serve at room temperature.

Variations

 2 anchovies packed in oil, roughly chopped and added with the olives. If salted, rinse before adding.

1 tablespoon capers added with the olives.

Lavash Crisps

Served in the Middle East, lavash and pita are commonly used instead of bread. Flat, unleavened lavash has a delicious, lightly grilled flavor when fresh. Making crisps makes use of lavash that might otherwise have gotten stale and gone to waste.
Lavash crisps have more flavor and are more flaky than commercially manufactured chips. Serve them with salsa, tapenade, dips or thin slices of cheese.

The crisps will last for weeks if kept refrigerated in an airtight container. 

Serves 6-8

Ingredients

1 large or 2 small sheets of lavash
1 cup olive or safflower oil
Sea salt and black pepper to taste
5-6 paper towel sheets

Directions

Cut the lavash sheets into 2” squares by cutting the sheet in half, placing the halves on top of each other, cutting those in half and doing that again until the pieces are 2” wide. Cut the 2” wide strips into 2” squares and set aside. If not cooked immediately, store in an airtight container.

In a large frying pan or griddle, heat ¼ cup of the oil. Season with sea salt and black pepper and heat on a medium-low flame. Be careful not to burn the oil or cause it to smoke.

Lay a paper towel sheet on a large plate or baking sheet.

Add the lavash squares to the hot oil. Do not overlap. Using tongs, turn over the lavash when they are lightly browned and cook the other side. They cook quickly so watch them closely.

Remove the cooked crisps and place them on the paper towel. Cook another batch. Place a clean paper towel on top of each layer to absorb excess oil.

Replenish the oil in the frying pan as needed and season with sea salt and black pepper. Allow the oil to reach the proper temperature before adding more lavash.

Discard the paper towels when the crisps cool. Store refrigerated in an airtight container. Serve at room temperature.

Saturday, November 23, 2013

Risotto with Toasted, Crushed Hazelnuts - a Perfect Thanksgiving Side Dish

For Thanksgiving we have a menu we love. Roast turkey, corn bread stuffing with Italian sausage, shiitake mushrooms and Turkish apricots, baked sweet potatoes with butter, cranberry sauce, roasted Brussels sprouts and sautéed string beans with garlic-toasted almonds.

Since I started doing travel writing, I like to include one dish I've learned to make on a trip. Last year, I made Moroccan style pickled vegetables to go with the Kosher dill pickles I've made for years. This year I am going to make risotto with hazelnuts.
On a month long trip in Switzerland, I enjoyed dozens of meals. Since I was researching local Swiss wines, those meals were wine-paired. Needless to say, I had a very good time. At one of the first stops on the trip, our group of six journalists was treated to a dinner at the chef's table at restaurant Le Mont Blanc at Le Crans in Crans-Montana, Switzerland. One of our group was a vegetarian. We always envied her meals, especially that night when she was served risotto with hazelnuts.

That dish made an impression. So, last night I made risotto and hazelnuts. The combination of creamy rice and crunchy nuts is hard to beat. I'm thinking it would be a great Thanksgiving side dish.

Herb Scented Risotto with Toasted, Crushed Hazelnuts

Last night's risotto was made with vegetable stock. Any stock would add to the flavors of the rice, but whatever kind of stock you use, it would improve the dish if you use homemade not store-bought stock. The salt content of processed stock is very high and the flavor is, well, not that great, in my opinion. Making stock is not difficult. Stock freezes so easily if kept in an air-tight container. It will keep for months with no lessening of flavor.

The recipe can be entirely vegetarian or can be adjusted to include meat, poultry and seafood. Adding more vegetables and protein will turn this side dish into an entrée.

If whole, toasted hazelnuts with the skins removed are not available, find whole, raw hazelnuts. Roast in a toaster oven set at 350 F for five minutes. Remove when hot and wrap in a cotton towel. Rub with your hands. The skins will come off. To crush then, place the roasted hazelnuts on a cutting board and press down on the nuts with the flat side of a chefs knife. That will crush them. Use the cutting edge of the knife to more finely chop the nuts. Reserve.

Serves 4

Ingredients

2 cups risotto
4 cups homemade stock (vegetable, chicken, duck, beef, pork or shellfish)
2 cups leafy green (black kale, spinach, Italian parsley) washed, stems removed, finely chopped
1 cup yellow onion, washed, peeled, finely chopped
4 garlic cloves, skins and root end removed, finely chopped
5 brown or shiitake mushrooms, washed, pat dried, thinly sliced
1/2 cup whole hazelnuts, toasted, skins removed, crushed
1 1/2 tablespoons olive oil
Sea salt and black pepper to taste
1 tablespoon sweet butter (optional)
2 cups freshly grated Parmesan or Romano cheese

Directions

Heat a large frying pan with half a tablespoon of olive oil. Season with sea salt and black pepper. Add the leafy greens, onion and garlic. Sauté until lightly browned. Remove from the pan and set aside.

Add the rest of the olive oil and heat over a medium-low flame. Add the risotto and sauté for 3-5 minutes until the rice is translucent. Add back the sautéed vegetables and stir well.

Add half a cup stock, stir well and let the rice absorb the liquid. Add a half of cup of stock as the liquid disappears. Continue stirring and adding stock until the rice is al dente. If you run out of stock, a little bit of water can be used.

Finish the risotto with a tablespoon of sweet butter and adjust the seasoning with sea salt and black pepper.

Top with the crushed hazelnuts. Serve with grated Parmesan or Romano cheese on the side.

Monday, September 2, 2013

Don't Do This At Home! Keep Your Eye On the Barbie When the Corn's On the Grill

Cardinal sin of cooking. Put a pan on the stove or a steak on the barbie and then go answer a couple of emails. Minutes pass. The emails are sent. A link sent from The Wrap leads to a few more minutes following the latest entertainment news and gossip. More minutes pass as checks are written to pay bills due in three days.
Then....what's that scent in the air? Sweet smoke with a hint of bitterness. Oh, yeah, that's the bacon in the frying pan or the ears of corn on the grill, now burnt to a blackened crisp. Perfect for the trash and compost bin but definitely no good for the table.

First rule of cooking: use a timer.
Second rule of cooking: keep it with you.

Third rule of cooking: when it goes off, check what you are cooking.

Yesterday I was making grilled corn for one of my favorite summer salads: chopped italian parsley with grilled corn. Simple, easy-to-make and delicious, the salad is such a summer treat. The perfect kind of dish to serve with grilled meats, fish and poultry.

The ears of corn were husked, washed and dried, then dredged through seasoned olive oil and placed on the grill. Nothing could be easier. All I had to do was turn the ears every couple of minutes, take them off the grill, let them cool and remove the kernels, toss them with freshly cut parsley and season the salad with more olive oil and reduced balsamic vinegar.
Easy, except I burnt the nine ears of corn.

That meant a dash back to the Sunday farmers market to pick up nine more ears from Underwood Family Farms and do it all again.

And so it goes. Use a timer. Carry it with you. Listen when it goes off. And all will be good.

Parsley and Grilled Corn Salad

Yield 4 servings
Ingredients

2 ears corn, husks and silks removed, washed, dried
1 bunch Italian parsley, washed, stems discarded, leaves finely chopped
2 tablespoons olive oil
4 tablespoons balsamic vinegar
Sea salt and black pepper to taste

Directions

Pre-heat the grill to medium-hot or set the oven to 350F.

Pour 1 tablespoon olive oil on a large plate or baking tray, season with sea salt and black pepper and dredge each ear of corn to coat.

Using tongs, place the seasoned ears of corn on the grill or on a parchment lined baking tray in the oven.

Turn every 3-5 minutes so the kernels brown but don't burn.  Remove once the some of the kernels have browned. Set aside to cool.

Using a sharp chefs knife, cut the kernels off the cobs and collect in a large mixing bowl.

Add the finely chopped Italian parsley, toss well and dress with the remaining olive oil.

Place the balsamic vinegar in a small saucepan over low heat. Gently reduce to 1 tablespoon. Allow to cool and add to the corn and parsley mixture. Toss well.

Serve cold or at room temperature.

Variations

Add 2 tablespoons raw or grilled onions.

Add 1 avocado, diced.

Add 6 quartered cherry tomatoes.

Add dusting of cayenne.

Add 2 cups cooked chicken breast or grilled shrimp.

Saturday, August 31, 2013

Tomato Pintxos for Labor Day or Any Day

On a trip to Northern Spain in the spring, I discovered pintxos.
In Spanish bars, the appetizers served with beverages are tapas (about which everyone knows), pintxos and bocadilas. There's an easy way to distinguish one from the other. No bread on the plate, it's tapas. One slice of grilled bread, pintxos. Two pieces of bread (or a roll), bocadillas.
Bar food can be as simple as a bowl of beer nuts, but in Spain having a bite to eat in a bar means something very different.
On the trip, we ate elaborately designed pintxos with shrimps riding bareback on saddles of caramelized onions and smoked salmon that topped freshly grilled slices of sourdough bread.
Others featured anchovies with hardboiled eggs, whole roasted piquillo (small red peppers) stuffed with tuna fish, prosciutto wrapped around wild arugula leaves, delicately thin omelets rolled around finely chopped seasoned tomatoes and flat strips of roasted red bell peppers topped with slabs of brie and an anchovy fillet.
The invention and flavors of pintxos are unlimited. Think of wonderfully supportive flavors and textures to place on top the solid foundation of a thin slice of grilled bread and you have a beautiful and tasty appetizer to go with an ice cold beer, glass of crisp white wine or a refreshing summer cocktail like fresh fruit Sangria.
Tomato Pintxos with Fresh Tomatoes, Thin Sliced Olives and Dried Oregano

One of the best pintxos I enjoyed on the trip was the simplest. Don't get me wrong, I loved the elaborately constructed shrimp pintxos at Atari Gastronteka (Calle Mayor 18, 20001 Donostia-San Sebastián, Spain, 34 943 44 07 92) in San Sebastián, but in Oviedo, near the Cathedral in the old town, in a working man's bar away from the tourist crush, A'Tarantella (Calle Jesus n 1, Oviedo, Spain, 985 73 81 65) restaurant served a simple pintxos that was one of my favorites.
Thin slices of tomatoes were laid on top of a piece of grilled bread, seasoned only with a drizzle of olive oil, salt, pepper, sliced, pitted olives were scattered on top and dusted with dried oregano.

Easy to prepare. Simple flavors. Delicious.

For the bread, a dense white or whole wheat loaf is best. The tomatoes should be fresh and ripe but firm.

The individual ingredients can be prepared an hour ahead but the pintxos should be assembled just before serving to prevent the bread from becoming soggy from all those delicious tomato juices.

Serves 4

Ingredients

2 large, ripe but firm farmers market fresh tomatoes
12 large, pitted green olives, thin sliced, 1/8"
8 slices thin sliced French bread
1/2 teaspoon dried oregano
1 tablespoon olive oil
Sea salt and black pepper to taste

Directions

Slice the bread 1/4" thick. Grill on a hot barbecue, cast iron frying pan with grill ridges or roast in a 450 F oven for a few seconds to put grill-marks on each side. Remove. Set aside.
Set up an assembly line with the ingredients ready to go as soon as the bread is grilled.

Using a sharp chefs knife, slice the tomatoes as thin as possible. The tops and bottoms of the tomatoes should not be used. They can be finely chopped and used as a topping for another pintxos or to create a salsa.

Assemble each tomato pintxos in the following order: grilled bread, drizzled with olive oil, tomato slices, pitted olive slices, a seasoning of dried oregano, sea salt, black pepper and (optional) a final drizzle of olive oil.

Serve immediately with ice cold beverages.


Monday, June 10, 2013

To Prepare a Father's Day Feast, Fire Up the Grill and Don't Forget the Sides

Since Father's Day coincides with the start of summer, grilling is the best way to celebrate male parenting.

For me, nothing is better than a platter of grilled Italian sausages with sautéed onions, deveined shrimp seasoned with olive oil, sea salt and black pepper, corn on the cob, charred red peppers mixed with capers and garlic and lobsters split open and doused with pats of sweet butter.  With a tossed arugula and carrot salad, a loaf of freshly baked bread and a fresh fruit salad and I am happy.
The best grilling is the easiest kind. Buy good sausages, seafood and chicken, drizzle with olive oil, season with sea salt, pepper and any dried herb you fancy, put it on a hot grill, turn diligently to prevent burning and serve when it's done.

When the boys come to the house to celebrate a birthday, mother's day or father's day, they frequently take command of the grill. As my younger son, Michael, reminds me, they are my sons so of course they are good cooks. And that makes me very very happy.

Our other son, Franklin, doesn't regard a meal a proper meal unless there are appetizers. The secret to a great grilled meal is what's served on the side. My contribution to your Father's Day celebration are three of my favorite sides. 

All three are addictive so you may find you'll be eating them all summer long. They are all easy-to-make. The tapenade and lavash crisps can be made a day or two ahead. The grilled corn salsa is best made fresh.

Grilled Corn Salsa

Adding corn caramelized from light grilling gives this salsa it’s distinctive sweetness. When you buy corn from the market, look for plump kernels. Avoid ears with wrinkled or shriveled kernels.
You can use any kind of ripe tomato you enjoy, but I prefer cherry tomatoes because they are sweet and they hold their shape after being cut up. For added color, select a basket with a mix of yellow and red cherry tomatoes.

Serves 4

Ingredients

1 ear of corn, husks and silks removed, washed
1 8 oz basket of ripe cherry tomatoes, washed, quartered
1 large shallot, ends and skin removed, washed and roughly chopped
½ cup Italian parsley, washed, leaves only, finely chopped
¼ teaspoon cayenne
2 tablespoons olive oil
Sea salt and black pepper to taste
Lemon juice to taste (optional)

Directions

Pre-heat the grill to medium-hot.

Drizzle the olive oil on a large plate and season with sea salt and black pepper. Roll the ear of corn to coat. Using tongs, place the corn on the grill.  Turn frequently to prevent burning.  Remove the corn when all the sides have light grill marks. Let cool. Cut off the kernels and place in a large mixing bowl.

Use a rubber or silicone spatula to transfer the seasoned olive oil from the plate into the mixing bowl with the corn.

Add the quartered cherry tomatoes, shallot and parsley. Toss well and season with the cayenne. Taste and adjust the flavors with more sea salt, black pepper, olive oil and lemon juice (optional).

Tapenade with Charred Garlic

A secret weapon in last minute cooking, tapenade brightens any meal either as an appetizer or a condiment. If you use pitted, canned olives, making tapenade will take 10-15 minutes.
 
The taste of your tapenade depends on the quality of the olives.

Serves 6-8

Ingredients

1 can pitted olives, drained weight 6 oz., preferably green or kalamata olives
2-3 tablespoons olive oil
2 garlic cloves with skins
¼ cup Italian parsley, washed, leaves only, roughly chopped
¼ teaspoon pepper flakes (optional)
Black pepper to taste

Directions

Skewer the garlic cloves on the end of a knife or a metal skewer and hold over a gas flame to burn off the outer skins. Let cool, remove any pieces of charred skin and roughly chop the cloves.

In a small blender or food processer, place the drained olives, olive oil, garlic, parsley and pepper flakes. Pulse until the olives are roughly chopped. Taste and adjust the seasoning with the addition of black pepper, sea salt, pepper flakes and olive oil.

Pulse again until the tapenade achieves the desired texture. Personally I like a tapenade that has a rustic look with the olives coarsely chopped rather than puréed.

Refrigerate until ready to use and serve at room temperature.

Variations

 2 anchovies packed in oil, roughly chopped and added with the olives. If salted, rinse before adding.

1 tablespoon capers added with the olives.

Lavash Crisps

Served in the Middle East, lavash and pita are commonly used instead of bread. Flat, unleavened lavash has a delicious, lightly grilled flavor when fresh. Making crisps makes use of lavash that might otherwise have gotten stale and gone to waste.
Lavash crisps have more flavor and are more flaky than commercially manufactured chips. Serve them with salsa, tapenade, dips or thin slices of cheese.

The crisps will last for weeks if kept refrigerated in an airtight container. 

Serves 6-8

Ingredients

1 large or 2 small sheets of lavash
1 cup olive or safflower oil
Sea salt and black pepper to taste
5-6 paper towel sheets

Directions

Cut the lavash sheets into 2” squares by cutting the sheet in half, placing the halves on top of each other, cutting those in half and doing that again until the pieces are 2” wide. Cut the 2” wide strips into 2” squares and set aside. If not cooked immediately, store in an airtight container.

In a large frying pan or griddle, heat ¼ cup of the oil. Season with sea salt and black pepper and heat on a medium-low flame. Be careful not to burn the oil or cause it to smoke.

Lay a paper towel sheet on a large plate or baking sheet.

Add the lavash squares to the hot oil. Do not overlap. Using tongs, turn over the lavash when they are lightly browned and cook the other side. They cook quickly so watch them closely.

Remove the cooked crisps and place them on the paper towel. Cook another batch. Place a clean paper towel on top of each layer to absorb excess oil.

Replenish the oil in the frying pan as needed and season with sea salt and black pepper. Allow the oil to reach the proper temperature before adding more lavash.

Discard the paper towels when the crisps cool. Store refrigerated in an airtight container. Serve at room temperature.

Tuesday, April 23, 2013

Vegan Happiness

A few years ago my wife read the funny and subversive vegan anthem, Skinny Bitch. Overnight she became a pescaterian. Gone were the chicken wings and steak bones she used to gnaw on with great pleasure. Gone too were the sausages, bacon and ribs that were part of her diet. Overnight I lost my culinary-companion.

Since I'm a stay-home-writer (except when I'm traveling), I cook most of our meals. That means cooking twice. One meal for me (brown sugar ribs, grilled sausage, braised beef, Moroccan preserved lemon chicken) and another for Michelle (tofu with sautéed spinach and shiitake mushrooms, spring vegetable soup, grilled vegetable chopped salad).

Her change in diet caused me to change the way I cooked. Not having animal products to thicken sauces and add layers of flavor hobbled my cooking. Then I discovered three beautifully easy-to-prepare flavor enhancers that are inexpensive and totally vegan. Also, they do not use any oil.

Reduced Balsamic Syrup

When balsamic vinegar is heated over a low flame, water evaporates, leaving behind a dark, flavorful liquid. Amazingly, the vinegar's lip-smacking tartness is transformed into sweetness that retains a touch of acid. The thickened, reduced vinegar tastes very much like expensive, aged balsamic vinegar that sells for as much as $40.00 a pint. 
Use the least expensive balsamic vinegar available. The restaurant supply company, Smart & Final, sells a gallon of Italian balsamic vinegar for $20.00. That one gallon yields a quart of reduced balsamic which in turn will last months.

To make the reduction, use the ratio of 4:1. Four parts of vinegar will yield one part of the reduced liquid. 1 cup of vinegar will produce 1/4 cup of syrup, which will make enough salad dressing for four meals.

The key to the reduction is low heat. Overheating creates a harsh flavor. Allow only a few, occasional small bubbles to appear on the surface of the liquid. As the balsamic reduces, lower the flame.

I reduce a gallon at a time to create 4 eight ounce squeeze bottles. That amount lasts us months. To reduce that much liquid using a low flame can take six to eight hours.

You can make a smaller amount in a few minutes. Just keep in mind the ratio of 4:1 and a low flame.

Onion Jam

All vegetables give off their water when exposed to heat. Cooked over a low flame, thin sliced onions give off a milky liquid that adds to their sweet caramelization. Traditionally onions are sautéed in olive oil to prepare them for soups and stews. To avoid using olive oil simply use a low flame and stir continuously to prevent the onions from sticking to the bottom of the pot.

The onion jam can be refrigerated in airtight containers for a week or frozen for a month. Used as a base to make pasta sauces, soups or braises, the onions add a depth of flavor and sweetness.

In the Basque region of Spain, where pintxos, open faced sandwiches, are popular, room temperature onion jam is spread on grilled bread as the base for imaginative toppings that include charred red and green peppers, fresh wild arugula and quick fried thin strands of green cabbage.

Serves 8
Ingredients

2 pounds yellow onions, washed, ends and skin removed
Sea salt and ground pepper

Directions

Thinly slice the onions the long way, from stem to root. Heat a large pot over a low flame. Add the onions. Season with sea salt and pepper.

Stir frequently with a wooden spoon. Because the onions render slowly, it is helpful to have other things to do in the kitchen. As the onions cook, they give off their liquid. Stir the onions around in the liquid to coat.
In time, the onions will turn golden brown. The longer you cook them, the darker they will get. I like them light brown although some people enjoy the jam when the onions take on a rich, dark brown color. Taste and decide which you like.

Remove from the heat. Let cool and use or refrigerate.

Tomato Essence

Delicious any time of their season, ripe tomatoes are one of nature's wonders. Eaten fresh from the garden, few vegetables can compare with the rich flavor of a summer ripened tomato. For a cook wanting to avoid using oils and for anyone who wants to steer clear of commercially processed food, tomatoes are a great blessing.

With very little effort, roasted tomatoes give up a delicious liquid that can be used as the basis for a salad dressing, soups, pasta sauce and braised dishes.
The technique is the essence of simplicity: turn on the oven, put in the tomatoes, come back in an hour, they're ready to use. To create tomato essence, use a wire mesh strainer or, better yet, a food mill which will separate the solids from the liquids.

It's that easy.
Serves 8

Ingredients

4 pounds ripe, farmers market tomatoes, washed, stems removed

Directions

Preheat the oven to 450 F.

Place the whole tomatoes on a baking sheet lined with nonstick parchment or a Silpat sheet (available in most supermarkets and specialty stores like Sur Le Table or William Sonoma).

Bake one hour or until the tomatoes begin to sag.  Remove and let cool.
There are two liquids available at this point. A clear, light liquid, perfect to make a salad dressing and a thicker liquid with pulp that is a delicious basis for soups, pasta sauces and braised dishes.

To create the first lighter liquid, place the tomatoes in the strainer or food mill over a non-reactive bowl and gently press down. That will release the clear or lighter liquid. Remove, cover and refrigerate.

Place the bowl back under the strainer or food mill and vigorously press the tomatoes until all the liquid and pulp have passed through leaving only the skin and seeds behind.

Remove, cover and refrigerate.

Tomato Essence Salad Dressing
Serves 4

Ingredients

1/4 cup first pressing tomato essence
1 tablespoon reduced balsamic syrup
Sea salt and black pepper

Directions

Substitute the tomato essence for olive oil and mix well with reduced balsamic syrup. Season with sea salt and black pepper.

Friday, March 8, 2013

Asian Noodles Take a Trip to Italy

My wife is out town. I'm home alone and hungry. Since I work at the house, my routine is to write during the day and have dinner with my wife when she gets home from her office. Cooking our dinner gives shape to my day, since I plan the meal in the morning and do the prep when I'm taking breaks during the day.

Having dinner together is a fun part of the day. Over a meal with a salad, main course and a couple of side dishes, we have time to catch up.

Now I have to contemplate dinner for one and that's not as much fun.
Staring at the open refrigerator, considering what left-overs I could eat or what bits and pieces I could put together to make a meal (a farmers market Fuji apple with slices of comte cheese and bacon from breakfast), a different approach occurred to me.

Having grown up eating instant ramen, a cup of noodles is always the way to go when hunger strikes. But I'm a bit hesitant to go that route because of the high salt content and the predominance of chemical additives in the soup base. Happily, shopping at Asian markets, it's easy to see that ramen is only the tip of the iceberg when it comes to easy-to-make noodles.
Even in mainstream supermarkets, if you look in the Asian foods section, you'll find packages of dried egg and rice noodles. Go to an Asian market and the selection will border on the comic with aisle after aisle of fresh and dried noodles. Costing two or three dollars, one package of Asian noodles will easily feed 4-6 people.
If you want, you can certainly prepare the noodles with Asian sauces and ingredients. Personally, I like to combine the noodles with braised meat or poultry and vegetables from our local farmers market. The result is a deliciously comforting Asian-Italian fusion.

I like the dish so much, when my wife comes home, I'll make a bowl for her.

Asian Noodles, Italian Style

Use raw meat and poultry or leftovers from another meal. For stock, home made is preferable to avoid the excessive amounts of sodium in canned versions. The dish can easily be made vegetarian by omitting the meat and poultry. Other vegetables can be added or substituted for the ones I used and, if you like heat, dust the braise with cayenne or a scattering of pepper flakes.

Serves 4

Ingredients

2 pounds uncooked deboned chicken, pork shoulder or top sirloin, washed, pat dried and thin sliced or use 1 1/2 pounds cooked chicken, pork or beef
1 medium yellow onion, washed, ends removed, roughly chopped
2 garlic cloves, peeled, root ends removed, finely chopped
6 shiitake mushrooms, washed, stems trimmed to remove dirt, thin sliced
2 carrots, washed, ends removed, peeled, cut into rounds
2 cups broccoli crowns, washed, sliced into florets
4 cups kale leaves, washed, stems removed or spinach leaves, washed, roughly chopped
2 cups stock, chicken, beef, pork or vegetarian, preferably home made
2 tablespoons olive oil
1/2 to 1 pound of Asian noodles
Sea salt and black pepper to taste
2 tablespoons sweet butter (optional)

Directions

Heat a large pot with water. Bring to a boil. Unlike Italian pasta, Asian noodles do not require adding salt or oil to the water. Wait to add the noodles until the braise is finished because the drained noodles will congeal quickly.

In a large saucepan or chefs pan, heat the olive oil. Add the onions, garlic and shiitake mushrooms and sauté until lightly browned.  If using uncooked chicken or meat, add now and cook until lightly browned.

Add the broccoli and kale and sauté until wilted. If using cooked chicken or meat, add along with the carrots and stock. Simmer 10 minutes until the carrots are tender.

Taste and adjust the seasoning with sea salt, pepper and (optional) the sweet butter. Reduce liquid to half by cooking another 5 minutes. Lower the flame.

Add the noodles to the boiling water and stir well using tongs or chop sticks to separate the noodles. Read directions for cooking time. Before draining, taste a noodle and confirm doneness. Drain.

Add the noodles to the braise and toss well to coat with the sauce.

Serve hot in bowls with chop sticks or on plates with forks and large spoons.

Friday, July 27, 2012

Garlic Sautéed Yellow Squash and Carrots

In summers past, I grew yellow squash with great success. The plants spread to every inch of the garden, threatening to overwhelm tomato plants, the herb garden and a small patch of arugula.
After the vines firmly established themselves, the long, fat squash seemed to appear overnight. What to do with all those squash?

A neighbor saved the day. She loved squash blossoms. She would nip the problem in the bud, so to speak, by picking blossoms before the squash could appear.

Ultimately our best solution was avoidance. We stopped planting squash. Problem solved.

But I missed squash's pleasant crunch and clean flavor. Last week we were gifted with a basket of zucchini and yellow squash from our next-door neighbor's front yard garden. Picked while they were young, before they became watery, the zucchini and squash were unblemished, firm and the picture of health.

There were a great number of ways to prepare such perfect specimens. They could be steamed, grilled or even eaten raw in thin slices or grated. Because I had a beautiful bone in ribeye steak, I decided to sauté them with garlic to use as a side dish.

Sautéing would caramelize and bring out their hidden sweetness. Combined with carrot rounds, the color and texture contrast would add to the pleasures of the dish.

Steak never had such a pleasant companion.

Garlic Sautéed Squash and Carrot Rounds


Time: 30 minutes.

Yield: 4 servings

Ingredients


4 medium sized yellow squash, washed, ends trimmed, cut into 1/4" thick rounds
4 medium sized carrots, washed, peeled, ends trimmed, cut into 1/4" thick rounds
1 small yellow onion, skins and root end removed, washed, roughly chopped
4 garlic cloves, skins and root ends removed, finely chopped
1 tablespoon olive oil
1 tablespoon sweet butter
Sea salt and black pepper

Directions


Heat a large frying or chef's plan with olive oil, seasoned with sea salt and pepper.  Add onions and garlic. Sauté until lightly browned. Add yellow squash and carrots. Sauté until lightly browned. Finish with sweet butter.

Taste and adjust seasoning with sea salt and pepper. Serve hot.

Variations


Dust with 1/4 teaspoon cayenne for heat.

With the carrots and squash, add 1/2 cut washed, trimmed green beans, cut into 1/2" long pieces.

With the onions and garlic, add 1 tablespoon washed, trimmed shiitake mushrooms, roughly chopped.

Once all the vegetables are cooked, add 2 cups cooked pasta, toss, dust with freshly grated Parmesan cheese and serve as a side or main dish.