Showing posts with label baking. Show all posts

Tuesday, March 11, 2014

Apple Cinnamon Macarons

Every season (except winter) seems too short.  I always end up longing for the fruits of seasons long before they come around again.

I created these beauties to celebrate the fall, but since they use freeze dried apples you can enjoy them year-round.  The caramel sauce was a little thin for macarons even straight from the fridge, so perhaps using it to make a bourbon caramel cream cheese frosting would make for a better filling?

Oh, but wait!  I almost forgot.  YOU CAN MAKE CARAMEL IN THE MICROWAVE.  I know.  It blew my mind, too.


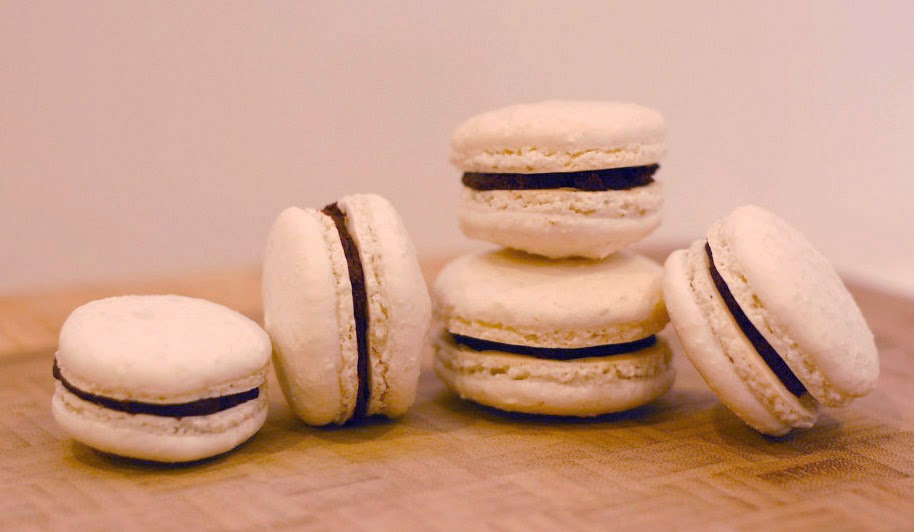
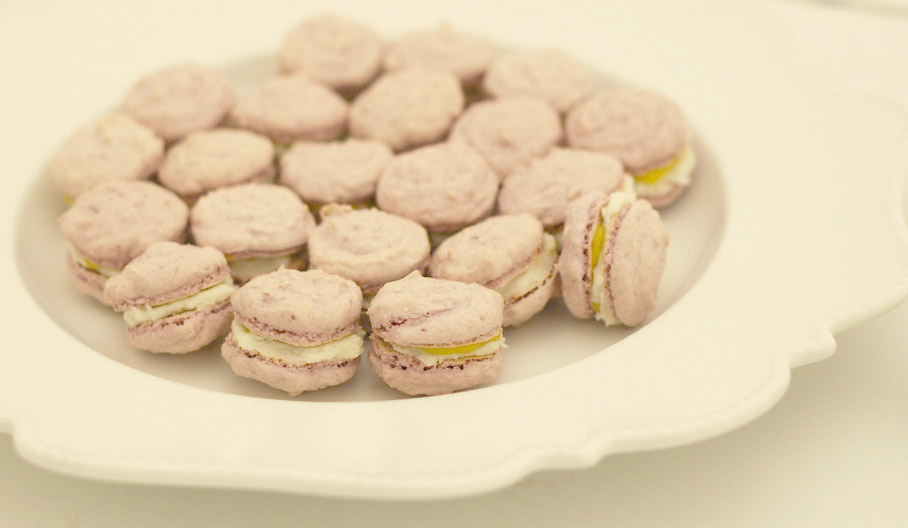
Apple Cinnamon Macarons with Salted Bourbon Caramel

190g almond meal
22g powdered freeze dried apples
212g powdered sugar
2t vietnamese cinnamon
82g & 135g egg whites, divided
354g sugar
237g water
Salted Bourbon Caramel Sauce, see below

Preheat the oven to 350deg and make sure the rack is in the middle of the oven.

Combine the almond meal, freeze dried apples, powdered sugar and cinnamon in a large bowl and whisk together to blend well and break up any clumps.  Make a well in the center of the dry ingredients. Pour in the 82g of egg whites and blend into the dry ingredients until evenly mixed, forming a thick paste.

Combine the 354g granulated sugar with the water in a small saucepan over medium-high heat.  Keep a candy thermometer attached to the side and be watchful! We're heating up the syrup to 248deg, but when it hits 200deg, begin whipping the 135g egg whites with a pinch of granulated sugar in a mixer on medium low speed.  Continue whipping the egg whites on medium speed until soft peaks form.  If soft peaks form before the syrup reaches 248deg, reduce the mixer speed to low to keep the egg whites moving.

Immediately remove the syrup from the heat when it hits 248deg.  Increase the mixer speed to medium and pour the syrup down the side of the bowl in a slow drizzle until fully incorporated.  Increase the mixer speed to medium-high and whip the meringue until stiff, glossy peaks form.

Add the meringue to the almond mixture in thirds, folding in each addition gently until smooth.  You may not use all of the meringue, so add it gradually.  The desired end-point is a smooth batter that runs in thick ribbons off your spatula.

Add the batter to a pastry bag fitted with a plain round tip with a 1/2" opening (or a ziploc bag with a corner cut off to a 1/2" opening).  Holding the bag perpendicular to the baking sheet, pipe rounds onto a parchment-lined baking sheet.  I find a template slipped under the parchment works well for even piping, just be sure to remove the paper before putting it in the oven!  Small peaks that you may see immediately after piping should smooth out if the texture of the batter is correct.

Transfer the baking sheet to the oven and immediately reduce the temperature to 325deg.  Bake for 9-12min, until the tops are smooth and set and feet have formed around the bottom.  Let the shells cool briefly on the baking sheet (~5min), and then peel them away from the parchment and place on a cooling rack.  They should come away easily and fully intact.  Repeat as needed with the remaining batter, replacing the parchment paper with each batch (I was feeling thrifty and used both sides) and bringing the oven temperature back up to 350deg before each batch.

Once the shells are baked and cooled, match them up in pairs by size.  To one macaron shell, add a bit of salted bourbon caramel sauce, then top with the paired shell.  Store in an airtight container in the refrigerator.  These get better with a little time in the fridge, so don't hesitate to make them a ahead of time.

Salted Bourbon Caramel Sauce
adapted from gimme some oven
yield ~1c

1c evaporated cane juice (or granulated sugar)
2T Lyle's Golden Syrup (or make your own sugar cane syrup)
2T water
1/4t fresh lemon juice
1/2c heavy cream, heated (I just warmed a bit
1T unsalted butter, softened
1t fleur de sel
1/4c bourbon vanilla (if you don't have any vanilla beans soaking in bourbon, just add 1/2t vanilla extract to your bourbon)

In a large glass measuring cup (or other microwavable bowl), add the sugar, sugar syrup, water and lemon juice.  Whisk together and cook on high for 5min.  Be careful not to overcook as it can burn!

Remove from the microwave and place on a kitchen towel.  Let cool for 3-5min, the color will deepen a bit more as it sits.

Begin by whisking in 1T cream, keep whisking as it will bubble and froth.  Continue whisking as you add in the rest of the heavy cream in a slow stream.  Finally, add bourbon, butter and salt, whisking well to combine.

Serve warm or transfer into a glass jar and let cool and thicken in the fridge.

Wednesday, December 11, 2013

Coconut Macarons w/Ganache

My intention was not to stop blogging for months...  how did it get to be December already?!?  I'm going forgo the excuses reasons and jump right back in with a cookie recipe I hope you'll enjoy.  As with most things, coconut is better with chocolate, and these macarons did not disappoint.


While you may not think of macarons as a traditional holiday cookie, I can't think of a day when I wouldn't want to eat one :)  And while they do require some time (they take me ~2hrs start to finish), one of the great things about macarons is that they are best made a day or two before you actually need them!


Coconut Macarons with Dark Chocolate Ganache
adapted from Annie's Eats & Chez Us
yield:  think I got about 70 using this template

There's no need to age egg whites when using this method, so once you have all your ingredients you can get to baking.

For the macaron shells:
106g almond flour
106g unsweetened coconut, finely shredded
212g powdered sugar
82 and 135g egg whites, divided
354g and a pinch of granulated sugar, divided
237g water

For the ganache:
200ml heavy cream
200g dark chocolate, chopped
1/2t cinnamon

Preheat the oven to 350deg and make sure the rack is in the middle of the oven.

Combine the almond meal, coconut and powdered sugar in a large bowl and whisk together to blend well and break up any clumps.  Make a well in the center of the dry ingredients. Pour in the 82g of egg whites and blend into the dry ingredients until evenly mixed, forming a thick paste.

Combine the 354g granulated sugar with the water in a small saucepan over medium-high heat.  Keep a candy thermometer attached to the side and be watchful! We're heating up the syrup to 248deg, but when it hits 200deg, begin whipping the 135g egg whites with a pinch of granulated sugar in a mixer on medium low speed.  Continue whipping the egg whites on medium speed until soft peaks form.  If soft peaks form before the syrup reaches 248deg, reduce the mixer speed to low to keep the egg whites moving.

Immediately remove the syrup from the heat when it hits 248deg.  Increase the mixer speed to medium and pour the syrup down the side of the bowl in a slow drizzle until fully incorporated.  Increase the mixer speed to medium-high and whip the meringue until stiff, glossy peaks form.

Add the meringue to the almond mixture in thirds, folding in each addition gently until smooth.  You may not use all of the meringue, so add it gradually.  The desired end-point is a smooth batter that runs in thick ribbons off your spatula. [Note: I made extra this time as the last time I tried a coconut batch they could've used a little extra meringue.]

Add the batter to a pastry bag fitted with a plain round tip with a 1/2" opening (or a ziploc bag with a corner cut off to a 1/2" opening).  Holding the bag perpendicular to the baking sheet, pipe rounds onto a parchment-lined baking sheet.  I find a template slipped under the parchment works well for even piping, just be sure to remove the paper before putting it in the oven!  Small peaks that you may see immediately after piping should smooth out if the texture of the batter is correct.

Transfer the baking sheet to the oven and immediately reduce the temperature to 325deg.  Bake for 9-12min, until the tops are smooth and set and feet have formed around the bottom.  Let the shells cool briefly on the baking sheet (~5min), and then peel them away from the parchment and place on a cooling rack.  They should come away easily and fully intact.  Repeat as needed with the remaining batter, replacing the parchment paper with each batch (I was feeling thrifty and used both sides) and bringing the oven temperature back up to 350deg before each batch.

While the macaron shells are cooling, prepare the dark chocolate ganache.  Add chopped chocolate into a bowl and set aside.  Pour cream into a small saucepan and heat over medium heat.  Once the cream comes to a boil, pour over the top of the chocolate.  Let sit for a couple of minutes, then stir until the chocolate has fully melted.  Add cinnamon and stir well.  Let sit in the refrigerator ~1hr before using to fill macarons.

Once the shells are baked and cooled, match them up in pairs by size.  To one macaron shell, add a layer of ganache, then top with the paired shell.  Store in an airtight container in the refrigerator.  These get better with a little time in the fridge, so don't hesitate to make them a ahead of time.


What are you baking up this holiday season?  Or perhaps what treats are you looking forward to receiving?

Monday, September 16, 2013

Frosted Carrot Cake Bars

While my most recent cupcake adventure went quite smoothly, I did goof on one thing- way overestimating how much white chocolate whipped cream was needed. Don't get me wrong, I'm not complaining.  It went perfectly well with fresh-picked strawberries (as I had at the time, but it would go well with any fruit), but that only got me so far.

Enter these white chocolate whipped cream-topped treats: Carrot cake meets portability meets white chocolate.  Definitely a good reason to whip up a batch of white chocolate whipped cream, in case you needed one ;)


Frosted Carrot Cake Bars
adapted from Cookie Swap via use real butter
yield: ~2 dozen

These are best made ahead, as the white chocolate whipped cream melts on the warm bars and firms up a bit after a stint in the fridge.

for the crust:
1 1/2c whole wheat pastry flour (or AP flour)
2T evaporated cane juice (or granulated sugar)
1/2t salt
3/4c unsalted butter, softened and cut into T-size chunks

for the filling:
2 1/2T whole wheat pastry flour
1 1/4t cinnamon
1t ground ginger
3/4t ground cloves
1/2t salt
1/4t baking soda
14oz can sweetened condensed milk
2T unpacked dark brown sugar
2 large eggs
1 large egg yolk
1t vanilla extract
1 1/2c carrots, finely grated
1c pecans, lightly toasted and chopped
3/4c golden raisins
1/2c unsweetened coconut

for the topping:
1 1/2-2c white chocolate whipped cream

Preheat the oven to 350deg.  Line a 9x13 pan with foil, leaving 1" overhang around the edge of the pan.  Smooth out wrinkles and lightly coat with nonstick spray.

To make the crust, combine flour, sugar and salt in a food processor fitted with the metal blade.  Add butter and pulse until the mixture just starts to form a ball (15-20sec).  Transfer to the prepared pan and press evenly into the bottom.  Prick dough with a fork, then bake for 20-25min, or until lightly browned and firm to the touch.  Let cool on a wire rack for at least 30min.

In a small bowl, stir together the dry ingredients (flour, spices, salt and baking soda) and set aside.  In a large bowl, add the sweetened condensed milk, brown sugar, eggs, egg yolk and vanilla.  Whisk together until well combined.  Add the flour and whisk well, then stir in the remaining ingredients (carrots, pecans, raisins and coconut).  Pour the mixture over the crust and spread evenly.  Bake for 35-40min, or until the edges are caramel-brown.  Let cool on a wire rack.

While the bars are still slightly warm, add the whipped cream and spread evenly on the surface.  It will melt a bit, and that will aid in the spreading.  Once fully cool, transfer to the refrigerator overnight to allow the whipped cream to harden again.  If you need to serve these the same day you're baking, I would let the bars cool fully before adding any whipped cream.  Cut the bars and serve!


Tuesday, July 2, 2013

Red Velvet Cupcakes

I can't believe it's already been a month since I got to watch some pretty special people get married!  I think it's about time that I shared their second cupcake flavor-- Red velvet!  [the red cake + white frosting + blue wrappers...  totally acceptable for 4th of July celebrations ;)]


Now, I didn't grow up eating red velvet cake, so I didn't have a go-to recipe nor a good idea of what it should taste like.  Everyone seems to have their version of (aka the best) red velvet cake, so I had to test a few six out.  All cupcakes were topped with the same frosting in different designs and handed out to several taste-testers.  Man, was this tough!!  Luckily the bride and groom both agreed on their favorite- so we had a winning recipe.

from L: Joy the Baker/Hummingbird Bakery, Cook's Country (recipe here), Throwdown,
Smitten Kitchen, Cake Maven Raven (recipe here), Pinch My Salt

The true scientist I am, I had one more experiment to run.  The hypothesis: I can use a natural food coloring found in beets to achieve the traditional red velvet color.  I'll spare you the photos and explanations (it involves chemistry), but I tried two different methods and the results were clear:  no.  Before I knew it, it was time to start baking. Ugly brown cupcakes were not going to do it, so red food coloring it was.


With Rebecca's help, things went pretty smoothly and everything turned out well- I even had 5 minutes to get dressed before the ceremony started!  Ok, so I cut it a little close.  It was all worth it- these red velvet cupcakes were quite a hit :)


Red Velvet Cake/Cupcakes
adapted from Cake Man Raven bakery
yield: 1 8" 3-layer cake or 24 cupcakes

2 1/2c cake flour (how to measure flour)
1 1/2c evaporated cane juice or granulated sugar
1t baking soda
1T natural cocoa powder (I used Hershey's, do not use dutch-process)
1t sea salt
2 eggs
1 1/4c vegetable oil
1c buttermilk
1oz red food coloring
1t vanilla extract
1t white distilled vinegar

Preheat oven to 350deg.  Spray 3 8" cake pans with nonstick baking spray or line 2 cupcake tins with wrappers.

Add sugar and salt to a medium bowl.  Sift flour, baking soda and cocoa powder into the bowl.  Whisk dry ingredients together.

In the bowl of a stand mixer, beat remaining (wet) ingredients with the paddle attachment until well combined.  Add the dry ingredients and beat until smooth, ~2min.

Divide batter evenly between cake pans or use a large cookie scoop to evenly distribute between cupcakes. Bake until a toothpick inserted in the center comes clean, 15-18min for the cupcakes or 25-30min for the cake.  Let cool 5 min, then remove cupcakes from the pans onto a cooling rack.  For the cake, invert onto a plate and then invert back onto the cooling rack.  Let cool completely before frosting.


Cinnamon Cream Cheese Buttercream

1 1/2 sticks (12oz) butter, RT
1 1/2 pkgs (12oz) cream cheese, RT
1 1/2t vanilla extract
1.5lbs powdered/confectioners sugar
2 1/4t cinnamon

Whisk together powdered sugar and cinnamon.

In the bowl of a stand mixer, cream together butter and cream cheese until light and fluffy.  Add vanilla and blend until combined.  Add the powdered sugar and beat until smooth (start off slow to avoid getting sugar all over the kitchen, then speed up to incorporate well).

Can be made ahead and refrigerated, just bring to RT before using.


Which would win you over- red velvet or strawberry shortcake cupcakes??  I had to try both...

Monday, June 17, 2013

Strawberry Shortcake Cupcakes

Thank you to everyone who supported Bloggers Bake for the PMC- bidding, tweeting, or otherwise spreading the word!  We raised over $550 for Pediatric Oncology at Dana Farber Cancer Institute. 


June is pretty synonymous with strawberries (at least in my book).  When it came time to brainstorm flavors for a wedding I agreed to bake cake/cupcakes for, Strawberry Shortcake seemed like a no-brainer.  But in cupcake form?

Yes!!  The shortcakes came in the form of a vanilla bean biscuit, baked in a cupcake liner.  Fresh strawberries, bound with a little cornstarch-strawberry jell were the filling of the cupcakes.  And then the "frosting."

Oh, the frosting.  If you follow me on Facebook, you know this was a challenge.  I had my mind set on a white chocolate whipped cream- I had made it once and fell in love.  I kept trying to make a 'stabilized' version (with gelatin) only to have batch after batch fail.  I finally realized that I was whipping the heavy cream too long, waiting for the consistency of whipped egg whites.  This over-whipping caused the whipped cream to break down, resulting in a tasty mess.  Learn from my mistakes and don't do this!


When it came time to baking day (B day?), I still wasn't sure what I was going to use as a frosting.  A few 90degree days threw a wrinkle in my plans, but when I heard the venue was inside and air conditioned, I crossed my fingers and forged ahead- these cupcakes would be topped with white chocolate whipped cream!!

Success.  I used this to decorate instead of a pastry bag, fearing that the warmth from my hand would be too much for the whipped cream.  Thanks to Rebecca for this gadget, as well as her help with the baking.  We make a pretty stellar team if I do say so myself ;)


Strawberry Shortcake Cupcakes
adapted from How Sweet It Is
yield ~16

3c all-purpose flour (how to measure flour)
1/4 evaporated cane juice or granulated sugar
4t baking powder
1t baking soda
1/2t salt
1 1/2 sticks cold butter
1 large egg
1c milk
1 1/2T vanilla bean paste
Stawberry Filling, see below
White Chocolate Whipped Cream

Preheat oven to 425deg.  Prepare 2 cupcake pans with 16 liners.

Cut butter into ~1/2" chunks and place on a plate back in the fridge (or freezer if you're trying to do this on a 90deg day).

In a large bowl, combine dry ingredients (flour, sugar, baking powder, baking soda and salt) and whisk well to combine.  Add butter to the dry ingredients and mix with a pastry blender or your hands until you've got coarse pebbles.  If it's hot- I'd recommend minimizing heat from your hands and use a pastry blender.  If the butter has gotten too warm through mixing, place the bowl in the fridge or freezer for a few minutes before adding the wet ingredients.

In a large measuring cup or bowl, combine milk, egg and vanilla paste.  Mix well, ensuring that the vanilla paste is evenly distributed.  Pour wet ingredients into the flour/butter mixture and stir until just combined, the batter should look a little wet (try to avoid over-mixing).

Using a large cookie scoop, divide batter among cupcake liners.  Bake for 8-12min, until golden brown.  Let cool completely on a rack.

Once cool, use a cupcake corer or a knife to cut a whole in the center of the cupcake.  Fill with strawberry filling (easy to do using a pastry bag or ziploc with the end snipped off) and frost with white chocolate whipped cream.

Strawberry Filling
adapted from Baking Bites & Kathy Can Cook
Yield: enough for ~24 cupcakes

1lb fresh strawberries
4-6T evaporated cane juice or granulated sugar (depending on how sweet your berries are)
1T cornstarch
2 1/2T water
pinch salt
1/2t vanilla extract
1t fresh lemon juice

Wash and dry the strawberries, then remove the hulls.  Cut berries into a small dice and place in a medium bowl.

In a small pot, place 1/2c of the diced berries along with the sugar, cornstarch, water and salt.  Mash the strawberries with a potato masher or fork.  Cook over medium heat, stirring occasionally, until the mixture comes to a boil.  Boil for 1min, then remove from heat.  Add vanilla and lemon juice and whisk well.  Fold the cooked berries into the remaining fresh berries.  Refrigerate for a few hours or overnight before using to fill cupcakes.


Celebrate the first day of summer with some strawberry shortcake cupcakes-- you won't be sorry!!  Tune in next week to see what other flavor we baked up :)

Wednesday, May 29, 2013

Key Lime Tart

Nothing says summer like 90 degree days in the forecast!  But wait- wasn't it barely hitting 50 last weekend?  I'm so confused...


To spare any confusion, I made you this tart to get you in a summer frame of mind.  Light and ever-so-sweet, this was perfect topped with the strawberries starting to hit the market here.  I imagine it would also be stellar topped with fresh raspberries too!  Come to think of it, meyer lemon curd would also work fantastically well in the filling!


Key Lime Tart
crust adapted from Lottie & Doof
serves 8-10

For the crust:
1/2c finely shredded unsweetened coconut
1 stick butter
1/4c evaporated cane juice (or granulated sugar)
3/4t vanilla
1/4t salt
1c whole wheat pastry flour (or whatever you have on hand)

For the filling:
1/2c whipping cream
1/2t vanilla
1/2c key lime curd (or meyer lemon curd)

For garnish:
fresh raspberries or strawberries
lime zest
white chocolate whipped cream

Preheat overn to 350deg.

Spread coconut on a small sheet pan and toast in the oven for ~5min, until golden.

Melt butter in a medium saucepan over medium-low heat.  Remove from heat and let cool a bit.  While still warm, add sugar, vanilla, salt, flour and toasted coconut.  Stir together to form a dough, and then press into a 9" tart pan.  Bake for 15-20min, until browned.

For the filling, whip the cream until stiff peaks start to form.  Add vanilla and mix and low speed until incorporated.  Fold in lime curd.  Transfer to the tart shell and chill a few hours or overnight.

To finish, top with sliced strawberries or whole fresh raspberries.  Lime zest and white chocolate whipped cream can also be added if you're feeling fancy!


If you're reading this, I could use your help!  I'm riding in the Pan Mass Challenge this year for my mom and other family members and friends who have had cancer.  To help raise money for pediatric oncology research, I'm organizing a virtual bake sale June 10-12.  If you would like to donate a baked good, please check it out and spread the word- I won't be able to do it without you!!

Tuesday, April 9, 2013

Raspberry Coconut Macarons

These have flaws.  But I think that makes me love them even more.


With lime curd burning a hole in my pocket refrigerator, I wanted to come up with a great way to use it.  Of course I had to come up with something nice and easy, macarons!  Ha.  While my first attempts at macarons seemed successful, they weren't without failed batches that didn't make it to the blog.


I got pointed to Annie, who used a slightly different technique to make macarons- that is, to make an italian meringue to fold into the dry ingredients (thus known as the Italian method).  Her claims- more consistency, convenience, flexibility and a desirable texture- seemed attractive enough to give this technique a try myself.


You'd think I'd leave well-enough alone and just try her recipe as-is, right?  While that would've been the right thing to do, I did not.  To accompany the key lime curd, I went for a raspberry coconut macaron shell, substituting half of the almond flour with finely shredded coconut and dried raspberry powder.  While the flavors certainly shined through, I think these substitutions made the batter a bit dry even after adding all of the italian meringue and resulted in rather ugly and not-smooth macaron shells.  That said, I have to agree with Annie on all her points, and will be using this method for my next batch!!


Raspberry Coconut Macarons w/White Chocolate Buttercream & Key Lime Curd
adapted from Annie's Eats
yield:  think I got about 70 using this template

I think that freeze dried strawberries or even mango would work well instead of raspberries!  There's no need to age egg whites when using this method, so once you have all your ingredients you can get to baking.

For the macaron shells:
106g almond flour
86g unsweetened coconut, finely shredded
20g powdered dried raspberries (I just ground freeze dried raspberries in a coffee spice grinder)
212g powdered sugar
82 and 90g egg whites, divided
236g and a pinch of granulated sugar, divided
158g water

For the filling:
White Chocolate Buttercream (I made 1/2 recipe and didn't use it all)
Key Lime Curd (I used ~1/2c)

Preheat the oven to 350deg and make sure the rack is in the middle of the oven.

Combine the almond meal, coconut, raspberry powder and powdered in a large bowl and whisk together to blend well and break up any clumps.  Make a well in the center of the dry ingredients. Pour in the 82g of egg whites and blend into the dry ingredients until evenly mixed, forming a thick paste.

Combine the 236g granulated sugar with the water in a small saucepan over medium-high heat.  Keep a candy thermometer attached to the side and be watchful! We're heating up the syrup to 248deg, but when it hits 200deg, begin whipping the 90g egg whites with a pinch of granulated sugar in a mixer on medium low speed.  Continue whipping the egg whites on medium speed until soft peaks form.  If soft peaks form before the syrup reaches 248deg, reduce the mixer speed to low to keep the egg whites moving.

Immediately remove the syrup from the heat when it hits 248deg.  Increase the mixer speed to medium and pour the syrup down the side of the bowl in a slow drizzle until fully incorporated.  Increase the mixer speed to medium-high and whip the meringue until stiff, glossy peaks form.

Add the meringue to the almond mixture in thirds, folding in each addition gently until smooth.  Annie notes that you may not use all of the meringue, so add it gradually.  The desired end-point is a smooth batter that runs in thick ribbons off your spatula. [Note: I used all the meringue and the batter was not yet smooth enough.  Things turned out alright, but next time I'll try to make a little extra meringue!]

Add the batter to a pastry bag fitted with a plain round tip with a 1/2" opening (or a ziploc bag with a corner cut off to a 1/2" opening).  Holding the bag perpendicular to the baking sheet, pipe rounds onto a parchment-lined baking sheet.  I find a template slipped under the parchment works well for even piping, just be sure to remove the paper before putting it in the oven!  Small peaks that you may see immediately after piping should smooth out if the texture of the batter is correct.

Transfer the baking sheet to the oven and immediately reduce the temperature to 325deg.  Bake for 9-12min, until the tops are smooth and set and feet have formed around the bottom.  Let the shells cool briefly on the baking sheet (~5min), and then peel them away from the parchment and place on a cooling rack.  They should come away easily and fully intact.  Repeat as needed with the remaining batter, replacing the parchment paper with each batch (I was feeling thrifty and used both sides) and bringing the oven temperature back up to 350deg before each batch.

Once the shells are baked and cooled, match them up in pairs by size.  To one macaron shell, add a layer of white chocolate buttercream and a dollup of key lime curd, then top with the paired shell.  Store in an airtight container in the refrigerator.  These get better with a little time in the fridge, so don't hesitate to make them a day ahead!


What flavor macaron should I make next?

Friday, March 29, 2013

Browned Butter Easter Bars

A bonus post for you, brought to you by the Easter bunny ;)


With some Easter candy at home that I was all too tempted to eat in one sitting, I thought I should do something with them so that didn't happen.  And I ended up with Browned Butter Easter Candy Bars.  I mean, adding browned butter to Easter candy and I won't want to touch it, right?


Brilliant, Shannon.


Browned Butter Easter Candy Bars
adapted from Cook's Illustrated
Yield: ~24

14T unsalted butter, sliced into even chunks
2c + 2T whole wheat pastry flour (AP or white whole wheat)
1/2t salt
1/2t baking soda
1c unpacked brown sugar (light or dark)
1/2c evaporated cane juice (or granulated sugar)
1 lg egg
1 lg egg yolk
2t vanilla extract
2c chopped Easter candy (mine was a mix of mini eggs, chocolate covered peeps, lindt truffles, and creme eggs)
coarse sea salt, for the topping

Preheat the oven to 325deg.  Spray a 9x13" pan with nonstick spray and set aside.

Make the browned butter by heating a thick-bottomed pot or skillet over medium heat.  Add butter and swirl to the pan to ensure even cooking.  Whisk frequently as the butter begins to foam and then subsides.  As soon as you see browned bits beginning to form at the bottom of the pan, remove the pan from the heat and let cool.  It should smell deliciously nutty and start to drive you crazy.

Prepare your dry ingredients in a medium bowl; whisk together flour, salt and baking soda.

Once the browned butter has cooled to room temperature, add 3/4c to the bowl of a stand mixer.  Add brown and white sugars and beat until well combined.  Add the egg, egg yolk and vanilla extract and mix until smooth.  With the mixer on low, slowly add the dry ingredients and mix until just combined.  Fold in the chopped candy.

Add the batter to your prepared pan and press into the pan evenly with a spatula.  Top with a sprinkle of coarse sea salt.  Bake for 25-30min, until the bars are slightly browned and edges begin to pull away from the sides of the pan.  Cool completely on a wire rack before cutting into bars.  Store in an airtight container.


What's your favorite treat to bake up with holiday candy?

Wednesday, March 13, 2013

Key Lime Pie

Just in time for Pi Day... I have pie!

Image Source

Inspired by a recent trip to Key West, I wanted to make a key-limed treat to share with my lab.  The natural choice was key lime pie, but I wanted to add some of my own twists to the classic.


Instead of a traditional graham craker crust, I used toasted coconut cookies that I found at Trader Joe's and added in some shredded coconut for good measure.  While delicious, the crust was a bit crumbly, so beware when you're serving slices!


I topped the pie with some white chocolate whipped cream... holy moly this was delicious.  I should've used more to decorate the pie, but I misplaced it in my mouth somewhere.


Key Lime Pie
adapted from Browned Eyed Baker

For the Crust:
1 1/4c toasted coconut cookie crumbs (graham cracker, ginger snaps, or even chocolate cookies would also work)
1/2c unsweetened coconut (mine was reduced-fat)
2T evaporated cane juice (or granulated sugar)
6T unsalted butter, melted

For the Filling:
3t grated key lime zest
4 egg yolks
1 14oz can sweetened condensed milk (fat-free if you like)
3/4c freh key lime juice

For the White Chocolate Whipped Cream:
2oz white chocolate, chopped
3oz heavy cream, chilled

Preheat the oven to 325.

Start by making the filling; add the lime zest and egg yolks to the bowl of a stand mixer.  Whip egg yolks until fluffy, 5-6min.  Gradually add the sweetened condensed milk and whip until thick, 3-4min.  Lower the speed and slowly add key lime juice, continuing to mix until incorporated.  Set aside while you prepare the crust.

If you don't have a stand mixer, you should do the following:  Add the lime zest and egg yolks to a medium bowl and whisk for 2min.  Whisk in sweetened condensed milk, then key lime juice.

To make the crust, stir together cookie crumbs, coconut and evaporated cane juice.  While stirring continuously with a fork, slowly drizzle the melted butter into the mixture.  The mixture should look let wet sand, and a little crumbly if using the same coconut cookies.  Transfer the crumbs to a 9" pie plate and evenly press the crumbs to form a crust.  Bake until fragrant and beginning to brown, 12-15min.  Cool on a wire rack until it reaches room temperature.

Once cool, pour the filling into the crust.  Bake 15-17min, until the center is set yet still wiggly when jiggled.  Cool completely on a wire rack.  Refrigerate until well-shilled, at least 3 hours.

Add the chopped white chocolate to a small bowl and set aside.  In a small saucepan, heat the heavy cream over medium heat.  As the cream comes to a simmer, remove from heat and pour over the white chocolate.  Stir until smooth.  Refrigerate with the pie until completely chilled.

When white chocolate cream is cold and you're ready to serve the pie, whip the white chocolate cream.  Decoratively pipe on the pie or spread evenly over the filling.  Garnish with lime slices, if desired (I figured people wouldn't eat these so I left them out).  Serve!  Any leftovers can be covered in an airtight container (or covered in plastic wrap) and refrigerated for a few days.


Coconut and white chocolate were a natural fit, and I'd highly recommend you go make this to celebrate any day of the week!

Wednesday, March 6, 2013

Double Choc Muffins

Check out my guest post over at bran appetit today, I baked you a batch of double chocolate muffins!


There's a secret ingredient in there...  spent grain leftover from beer brewing ;)  Don't worry, you can substitute other flours if you don't brew!

Wednesday, January 30, 2013

Salty Apple Shortbread


You guys.

These cookies.

You need to make them!


I knew Dawn was onto something with her salty apple shortbread.  I immediately wanted to make them, and knew I needed to add honey and cheese.  It took three tries to get the recipe right, but man, it was worth it!


Salty Apple Shortbread w/Honey & Gruyere
adapted from evil shenanigans & vanilla sugar
yield:  16-24, depending on how you cut them

The key here is to use a pan that is large enough so they don't come out too thick and cake-like.  The balance of flavors here is also delicate-- cave-aged gruyere was a little too strong, and clover honey was too mild to taste.

7 1/4oz whole wheat pastry flour
2T arrowroot powder (or cornstarch)
1/3c sugar
3/4c cold butter, cut into cubes
2oz mild cheese, grated (TJ's gruyere/cheddar blend was perfect)
1t kosher salt
3T wildflower honey (or similar)
3/4c tart sweet apple, finely chopped (honeycrisp or pink lady)
fleur de sel, or other flaky sea salt, to taste

Heat the oven to 350deg.

To the bowl of a stand mixer, add flour, arrowroot, sugar, butter, gruyere, salt and honey.  Fit the mixer with the paddle attachment and blend on low speed.  When the mixture is just about to come together, add in the apples and continue mixing until a dough forms.  Transfer the dough to a 9 or 9.5" quiche/tart pan (or springform pan) and press down evenly into the pan.  Sprinkle with flaky salt.

Bake for 30-35min, until the edges are browned and the center almost set.  Cool completely in the pan, and then lift them out via removable bottom (or spring-loaded sides).  Cut into bars or wedges using a sharp knife.


Sweet.  Salty.  I can't get enough!!

Tuesday, January 8, 2013

Best of 2012

As we enter the second week of 2013, I wanted to recap some of the highlights from my kitchen last year.  It's always fun to browse through old posts and remember how many tasty things you've eaten :)

1.  The most viewed post here on Tri to Cook published in 2012 was my Kale Basil Pesto.  As kale has taken the place of spinach as my favorite green, it finds itself into many dishes here!  I enjoyed it on pasta as well as pizza, and know that it'll be made as soon as I have another prosperous basil plant!


2.  I finally crossed one item off my kitchen bucket list when I made macarons for a friend's baby shower.  These Red Velvet Macarons were filled with an amazing cinnamon cream cheese buttercream that was the perfect accompaniment to the cocoa-kissed shells.


3.  In the battle of the baby macarons, I have to say that the Lavender Macarons with Honey-Vanilla Mascarpone were my personal favorite, with a combination of flavors that are in perfect harmony.  There's not much else I can say about these, except that you should make them!!


4.  I combined a few more of my favorite things when making this Egg Roulade-  goat cheese, sweet potatoes, avocado and black beans make their way into an egg wrapper for one of my favorite brunch dishes this past year.  Easier than it looks, this makes an impressive dish to serve to guests!


5.  My Butternut Apple Bruschetta truly celebrates the cooler seasons and absolutely deserves to be on a Best-Of list.  Fabulous for parties, especially since the toppings can be prepared ahead of time!

Photo credit to Cara!

7.  Perhaps 2012 should be renamed the year of enchiladas, as these Butternut Black Bean Enchiladas were only one of the several varieties I made!  Stuffed with a mixture of black beans and kale, then smothered with a butternut squash-based sauce, these are definitely a way to ring in the new year. 


6.  When I dreamed up my Apple BBQ Sauce, I didn't imagine it to be as successful as it was, but it was good enough that I made another batch or two before tomato season ended!  This year I'll have to make a large batch and store some in the freezer so I can use it all year long.  I used it as a sauce for herbed turkey meatballs, pizza and even a few batches of enchiladas!


8.  Something happened this year that I never really dreamed as possible (at least not while I was in the 30-34 age group).  On a chilly morning at a sprint triathlon not too far away I finished first in my AG, qualifying me for nationals this year.  I knew my performance was solid during the race, but had no idea what was in store!


9.  This popular post could have had two titles- 'Ideas for your Superbowl Party' or 'How to Cater a Party for 40'.  Last holiday season I convinced my parents to let me cater the party they had for friends and my dads' colleagues.  I had fun planning and executing with the help of my family!


10.  Since I love all things almond, and go through cinnamon like there's no tomorrow, I couldn't wait to play with the concept of a horchata.  These Horchata Cupcakes, filled with dulce de leche were a delicious end to a dinner date with good friends.


11.  You guys love dishes that can do double-duty as much as I do!  I combined sweet potatoes and red lentils to create a party appetizer over the weekend and then morphed it into a soup for lunches during the week.


12.  I'm a huge fan of cocktails that work well both virgin and alcoholic, especially when it seems like everyone I know is pregnant these days ;)  This Pomegranate Vanilla Punch was absolutely delicious, no matter whether you added some bubbly or not!


I have no idea what 2013 has in store, but I know it'll be quite the ride!!

Wednesday, December 19, 2012

Spicy Chocolate Almond Cookies

While it is true year-round, I find that baking becomes more than just the act of measuring out some flour or butter, whisking egg whites or adding sugar.  It's a way for me to show how much I care, how grateful I am for those who have touched my life.


After spotting these cookies last year, they were at the top of my baking list this year.  I changed up the recipe a bit and added just enough heat to make each bite interesting.  I hope everyone that received these loved these as much as I did, and I suspect this will be the first batch of many!


Spicy Chocolate Almond Cookies
adapted from Saveur
yield: 5-6 dozen

The spice level of your cookie depends on the chocolate you use.  Mine was chipotle cinnamon, and there was some definite heat in the finish (Taza has similar flavors).  Feel free to adjust according to your tastes- try cinnamon or orange flavored dark chocolate for a less spicy cookie.

8oz almond meal (finely ground almonds)
1 1/2c evaporated cane juice
6oz spicy semisweet chocolate, finely chopped (*see headnote)
1 1/2t ground Vietnamese cinnamon
1/2t ground cloves
2 lg egg whites, lightly beaten

In the bowl of a food processor, add almond meal, sugar and chocolate.  Pulse until chocolate is finely ground and well distributed.  Add the remaining ingredients and pulse to make a thick dough.  Wrap dough tightly and refrigerate a few hours or overnight.

When you're ready to make the cookies, take half of the dough and place it between two sheets of parchment paper.  Transfer the remaining dough back to the fridge while you roll out the first half.  Roll out the dough to ~1/8" thickness.  Using cookie cutters, cut dough to your desired shape (the size will determine how many cookies you get).  If the dough is too sticky, pop it into the freezer (still in between parchment) for 10-15min and then try cutting again.  I found the warmer my hands got, the tougher the dough was to work with, so keep that in mind when handling the dough.  Transfer cut cookies to parchment lined baking sheets, spacing them 1" apart.  Re-roll scraps and repeat, then start with the second half of the dough from the fridge.

Let the dough dry for 3 hours.  (note:  I've seen some recipes that forgo this step, so I'm not sure it's completely necessary)

Preheat the oven to 300deg.  Bake until slightly puffed, 12-15min.  Let cool completely on cookie sheets.  Store in an airtight container.


Have you been doing any holiday baking??  If so, what have you been making?